Tips for Transitioning Your HVAC Between Seasons
Prepare your HVAC system for changing seasons with actionable spring and fall transition tips. Avoid breakdowns, reduce bills, and know when to call a pro.

Proactive Bi‑Annual Tune‑Ups Save Money and Prevent Failures
Twice‑yearly light‑touch DIY checks combined with professional maintenance when needed are the most cost‑effective strategy for extending equipment life and avoiding emergency calls.
What Matters Most
- DIY tasks like filter changes and debris clearance are safe and essential.
- Professional tune‑ups pay for themselves through efficiency gains and early problem detection.
- Use decision thresholds—age, noise, performance—to know when to call a pro.
- Always get three quotes and use tools like the Quote Checker before approving work.
- Regional climate factors (humidity, salt air, dust) demand tailored maintenance schedules.
Strengths
- No‑cost DIY steps that anyone can perform in under an hour.
- Clear separation between safe homeowner checks and licensed‑professional‑only work.
- Actionable cost estimates and interactive calculators reduce guesswork.
Weaknesses
- DIY cleaning may miss hidden refrigerant leaks or electrical issues.
- Professional tune‑up costs can range widely; unqualified techs may upsell unnecessary repairs.
- Seasonal prep does not guarantee a breakdown‑free year on older equipment.
DIY vs. Pro: When to Call a Technician
| Scenario | Usually do | Why |
|---|---|---|
| Outdoor unit is dirty | Clean it yourself | Improves efficiency with no electrical exposure risk |
| Odd sounds (grinding, squealing) | Call a pro | Indicates motor or bearing failure that requires replacement |
| System won’t turn on | Check thermostat and breaker first | If those are fine, a pro needs to diagnose high‑voltage or control board issues |
| Ice on the indoor or outdoor coil | Call a pro immediately | Refrigerant or airflow problem; running it risks compressor damage |
| Annual maintenance | Pro tune‑up | Includes checks you cannot perform, like refrigerant pressure and combustion safety |
Quick Answer: Seasonal HVAC Transition at a Glance
Switching your HVAC system from heating to cooling (or vice versa) without preparation can lead to breakdowns, wasted energy, and discomfort. A few simple steps now can save hundreds later. This guide covers what you can safely handle, when to call a licensed pro, and how to make smart decisions for your home’s system, whether you’re in a humid Houston summer or a frigid Chicago winter.
For most homes, transitioning your HVAC between seasons involves six key actions:
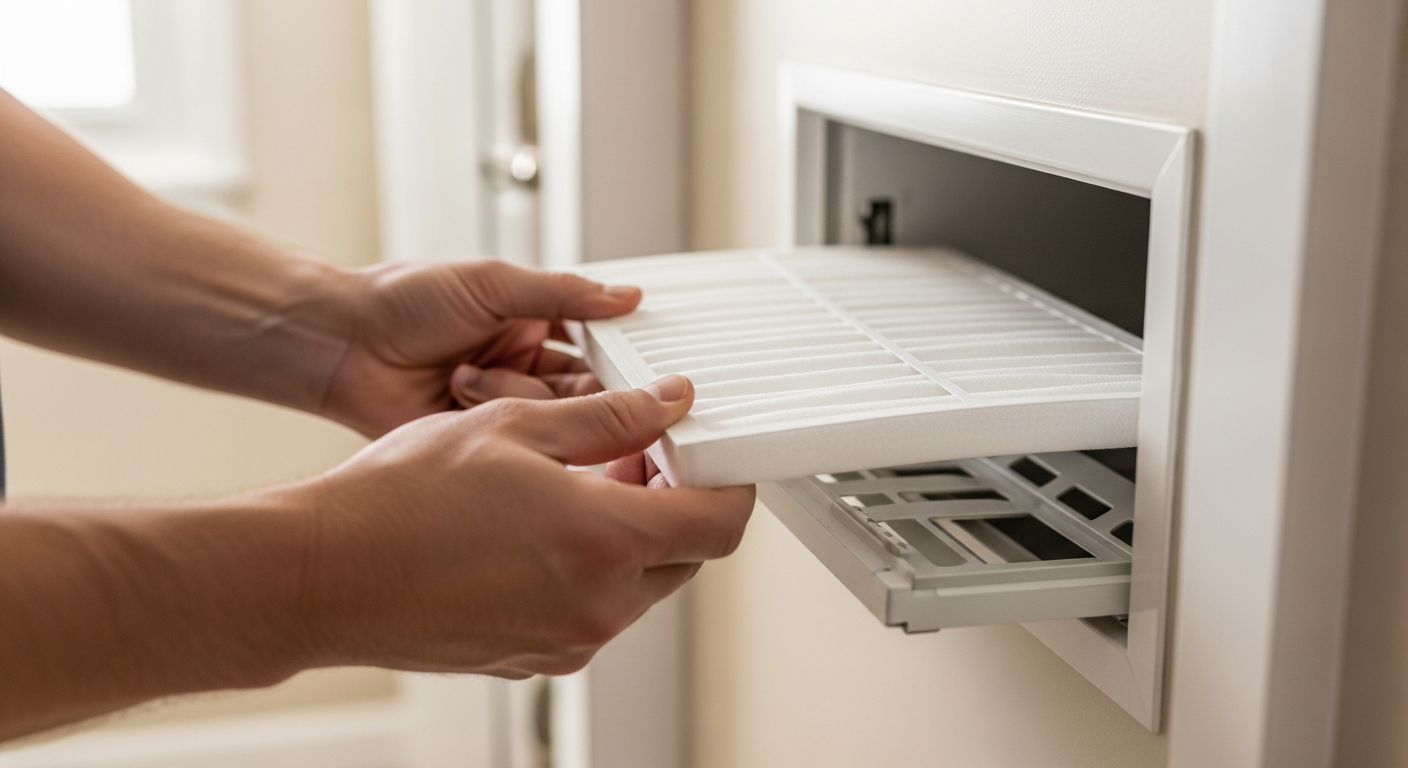
- Replace the air filter.
- Clear debris from the outdoor unit.
- Test the system before extreme weather hits.
- Check thermostat settings and batteries.
- Inspect visible ductwork for leaks or blockages.
- Schedule professional maintenance if it’s been over a year.
Below we break down the specifics for spring cooling and fall heating prep, along with cost guidance and tool links to help you budget.
Safety Boundaries: What You Can and Cannot Touch
Homeowners can safely do these tasks:
- Change air filters (every 1–3 months).
- Clean supply and return vents with a vacuum.
- Clear leaves, twigs, and overgrowth around the outdoor unit (keep 2‑ft clearance).
- Visually inspect the outdoor coil for ice or heavy dirt.
- Pour a cup of white vinegar into the indoor condensate drain to prevent clogs.
- Listen for unusual grinding, squealing, or banging.
- Check thermostat batteries and program schedules.
- Verify that no furniture or drapes block registers.
Do NOT attempt these—they require a licensed professional:
- Handling refrigerant or checking refrigerant pressures.
- Opening gas lines, sniffing for leaks, or inspecting the heat exchanger.
- Replacing capacitors, contactors, control boards, or any high‑voltage electrical components.
- Removing panels that expose live wiring or sealed refrigeration circuit parts.
- Working on compressors, blower motors, or gas valves.
- Bypassing safety switches or performing combustion analysis.
If you smell gas or see refrigerant oil, evacuate and call your utility or a pro immediately.
Seasonal Transition Task Checklist
| Task | Spring (Cooling Prep) | Fall (Heating Prep) | Who Does It |
|---|---|---|---|
| Air filter replacement | Install a fresh filter | Install a fresh filter | DIY |
| Outdoor unit clearance | Remove debris; gently rinse coil with garden hose (low pressure) | Clear debris; if using a cover, choose breathable material (never plastic for heat pumps) | DIY |
| Thermostat check | Switch to cooling mode, test schedule, replace batteries | Switch to heating mode, test schedule, replace batteries | DIY |
| Condensate drain flush | Pour 1 cup vinegar; check that water flows freely | Same for high‑efficiency furnaces with condensate | DIY |
| System test run | Run AC for 15 min; air should be 15–20°F cooler than room | Run heat for 15 min; listen for odd smells—dust burn‑off is ok, gas is not | DIY |
| Professional tune‑up | Check refrigerant, capacitors, motors, electrical connections, coil condition | Inspect heat exchanger, burner, gas pressure, combustion safety, venting | Pro only |
Common Pitfalls to Avoid
- Failing to switch the thermostat from “Heat” to “Cool” (or vice versa) and then wondering why the system won’t turn on.
- Running the system with a dirty filter for more than 3 months—this is the #1 cause of airflow‑related breakdowns.
- Covering a heat pump outdoor unit completely for winter—heat pumps run year‑round and need airflow. Only use a breathable cover or a shield against snow accumulation.
- Skipping the system test run and getting surprised by a dead AC on the first 95°F day.
Decision Rules: DIY or Pro? Thresholds That Matter
Use these rules of thumb when you’re unsure about handling an issue yourself:
- System age: If your unit is over 10 years old, any repair over $500 warrants a repair‑vs‑replace calculation. Use our calculator.
- AC performance: On an 85°F day, supply air should be at least 15°F cooler than return air. If less, call a pro—possible refrigerant or compressor issue.
- Noise: A sudden squeal, screech, or banging means a failing motor or loose part. Turn the system off and schedule service.
- Energy bill spike: A 20%+ jump compared to the same month last year, without weather changes, signals an efficiency problem.
- Gas smell: Evacuate immediately, then call your gas utility and an HVAC pro. Never ignore rotten‑egg odor.
- Ice on indoor or outdoor coil: Ice on the outdoor unit in cooling mode indicates airflow or refrigerant trouble; shut it off and call a pro.
In humid climates like Houston, also watch for musty odors—clogged drains can cause mold. In dusty regions like Phoenix, change filters monthly during peak seasons. Coastal homes should check for rust on outdoor unit cabinets; significant corrosion may shorten life.
Calculator and Tool Section: Estimate Before You Spend
Before hiring a contractor, use HVACDatabase’s free tools to understand fair pricing:
- HVAC Cost Estimator – Get a personalized price range for repairs or installations in your area.
- Quote Checker – Upload or enter a contractor’s bid to see if it falls within typical market rates.
- Repair or Replace Calculator – Input your system’s age, repair cost, and efficiency to decide whether fixing or upgrading makes more sense.
- System Age Decoder – Use your unit’s serial number to determine manufacture date—key for warranty claims.
- BTU Calculator – Verify that your system is properly sized; wrong size leads to comfort and efficiency issues.
When you’re ready to find a vetted pro, search our contractor directory or compare local contractors side‑by‑side.
Contractor Checklist: Questions to Ask Before Approving Work
A good seasonal tune‑up or repair should be transparent. Print or save this list when interviewing technicians:
- Are you licensed, bonded, and insured in my state? (Ask for the license number and verify it online.)
- Will you provide a written, itemized estimate before starting any work?
- Does your seasonal tune‑up include measuring refrigerant levels, inspecting electrical connections, and testing safety controls? What’s excluded?
- Can you explain what’s wrong in plain language and show me the problem (e.g., a photo of the dirty coil or the pressure reading)?
- Do you offer a maintenance plan, and what is the annual cost vs. one‑time visits? (Editorial estimate: plans range $150–$500/year.)
- What warranties come with parts and labor for any repairs?
- If replacement is recommended, what SEER2 rating, brand, and size do you propose, and why?
- How long have you been installing/servicing my brand?
- Will you pull any required permits, and are they included in the estimate?
Always get at least three quotes for any repair over $500 or any full system replacement. Use our Quote Checker to compare.
Methodology: How We Form Cost Estimates and Recommendations
The editorial cost ranges in this article (e.g., diagnostic visit $80–$200, seasonal tune‑up $80–$250) reflect national averages compiled from HVACDatabase’s network of contractors, adjusted for regional labor rates and typical equipment configurations. These are not guaranteed prices; your actual cost will vary based on system size, brand, accessibility, permit requirements, warranty status, and local market conditions. We recommend obtaining at least three written quotes for any major work. Our tools pull from real‑time industry data and are updated quarterly. All advice is reviewed by NATE‑certified technical editors to ensure conformance with manufacturer guidelines and safety standards.
Frequently Asked Questions
1. How often should I transition my HVAC between seasons?
Twice a year—once in early spring before cooling season and once in early fall before heating season. This proactive scheduling catches minor issues before they turn into expensive breakdowns during temperature extremes.
2. Can I clean my outdoor AC unit myself?
Yes, you can safely remove leaves and debris, gently rinse the coil with a garden hose (using low pressure and a fan‑shaped nozzle), and trim vegetation. Do not use chemical coil cleaners or remove the top grille/lid—those expose electrical components and spinning fan blades. Leave deep cleaning or fin combing to a professional.
3. Why does my heater smell bad when I first turn it on?
A dusty or burning smell is normal for the first 30–60 minutes of the heating season as accumulated dust burns off the heat exchanger. If the odor smells like rotten eggs or gas, shut the system off, open windows, and evacuate immediately. That indicates a gas leak—call your gas utility and a licensed HVAC technician.
4. Is a professional tune‑up really worth the cost?
For most homes, yes. A $150–$250 tune‑up can improve system efficiency by 5–15%, often saving more than the service cost on utility bills over a season. It also identifies small problems (loose belts, low refrigerant) before they cause catastrophic failures. Check if your local utility offers rebates for maintenance.
5. What’s the one thing most homeowners forget during seasonal transition?
Flushing the condensate drain line. A clogged drain can cause water damage, mold growth, and system shutdowns. Pour a cup of white vinegar down the indoor drain line access point each spring and fall to prevent blockages.
Related articles
Connect this page to adjacent guides so readers keep moving deeper into the topic cluster.

Understanding C Wire Adapters for Smart Thermostats
Missing the C wire for your smart thermostat? C wire adapters solve power issues without pulling new wiring. Compare types, costs, and installation options.

Tips for Choosing a Smart Thermostat for a Heat Pump
Learn which smart thermostat features prevent expensive auxiliary heat mistakes, how to verify compatibility, and when to call a pro.
Tips for Heating a Home With Radiant Barriers
Radiant barriers can reduce winter heat loss through ceilings, but they are not a replacement for insulation. Learn when they help and what else you need for a warm, efficient home.